
Getting your Hotwire Native app into the App Store
A practical, step-by-step guide to submitting your first Hotwire Native app. From setting up your developer account to hitting "Submit for Review."

Hey friends,
The hardest part of shipping a Hotwire Native app isn’t the code. It’s navigating Apple’s submission process for the first time.
There are a surprising number of gotchas that can cost you days or even weeks if you don’t know about them upfront. A DUNS number that can take a month to verify. An encryption compliance checkbox that silently holds up your TestFlight build. A rejection for “minimum functionality” because you didn’t make the app feel native enough.
I’ve shipped 25+ apps through this process (here’s what I’ve learned). This guide covers every step from setting up your developer account to hitting “Submit for Review.”
I’m Joe Masilotti, author of Hotwire Native for Rails Developers. This newsletter is where I share weekly thoughts on mobile app development, indie consulting, and doing great work while staying present at home.
Set up an Apple Developer account
Before you write a single line of code, enroll in the Apple Developer Program. This might sound obvious, but I’m putting it first for a reason: it can take weeks to get approved.
Enroll as an organization, not an individual. It’s better for credibility in the App Store, and it makes things easier if you ever need to transfer the app to another team or company.
Here’s the catch: organizations need a DUNS number, which is a unique business identifier from Dun & Bradstreet. Apple uses it to verify your company. And the verification process can drag on for a while. I had a client with 100% working code, ready to submit, who couldn’t get into the App Store for months because of an issue with their DUNS number. It delayed the entire launch.
Start the enrollment process as early as possible so it’s ready when you are.
Point to your production server
This one seems obvious, but it’s easy to forget when you’ve been developing locally for weeks. Swap out http://localhost:3000 for your production URL. Or, have your app do it automatically based on which environment it was installed from.
Make sure your production server is live and accessible before you submit. Apple’s reviewers will launch your app and try to use it. If it can’t reach your server, that’s an instant rejection.
Include an app icon
You only need a single 1024x1024 image. In Xcode, delete all the other size slots in the asset catalog and your one image applies everywhere.
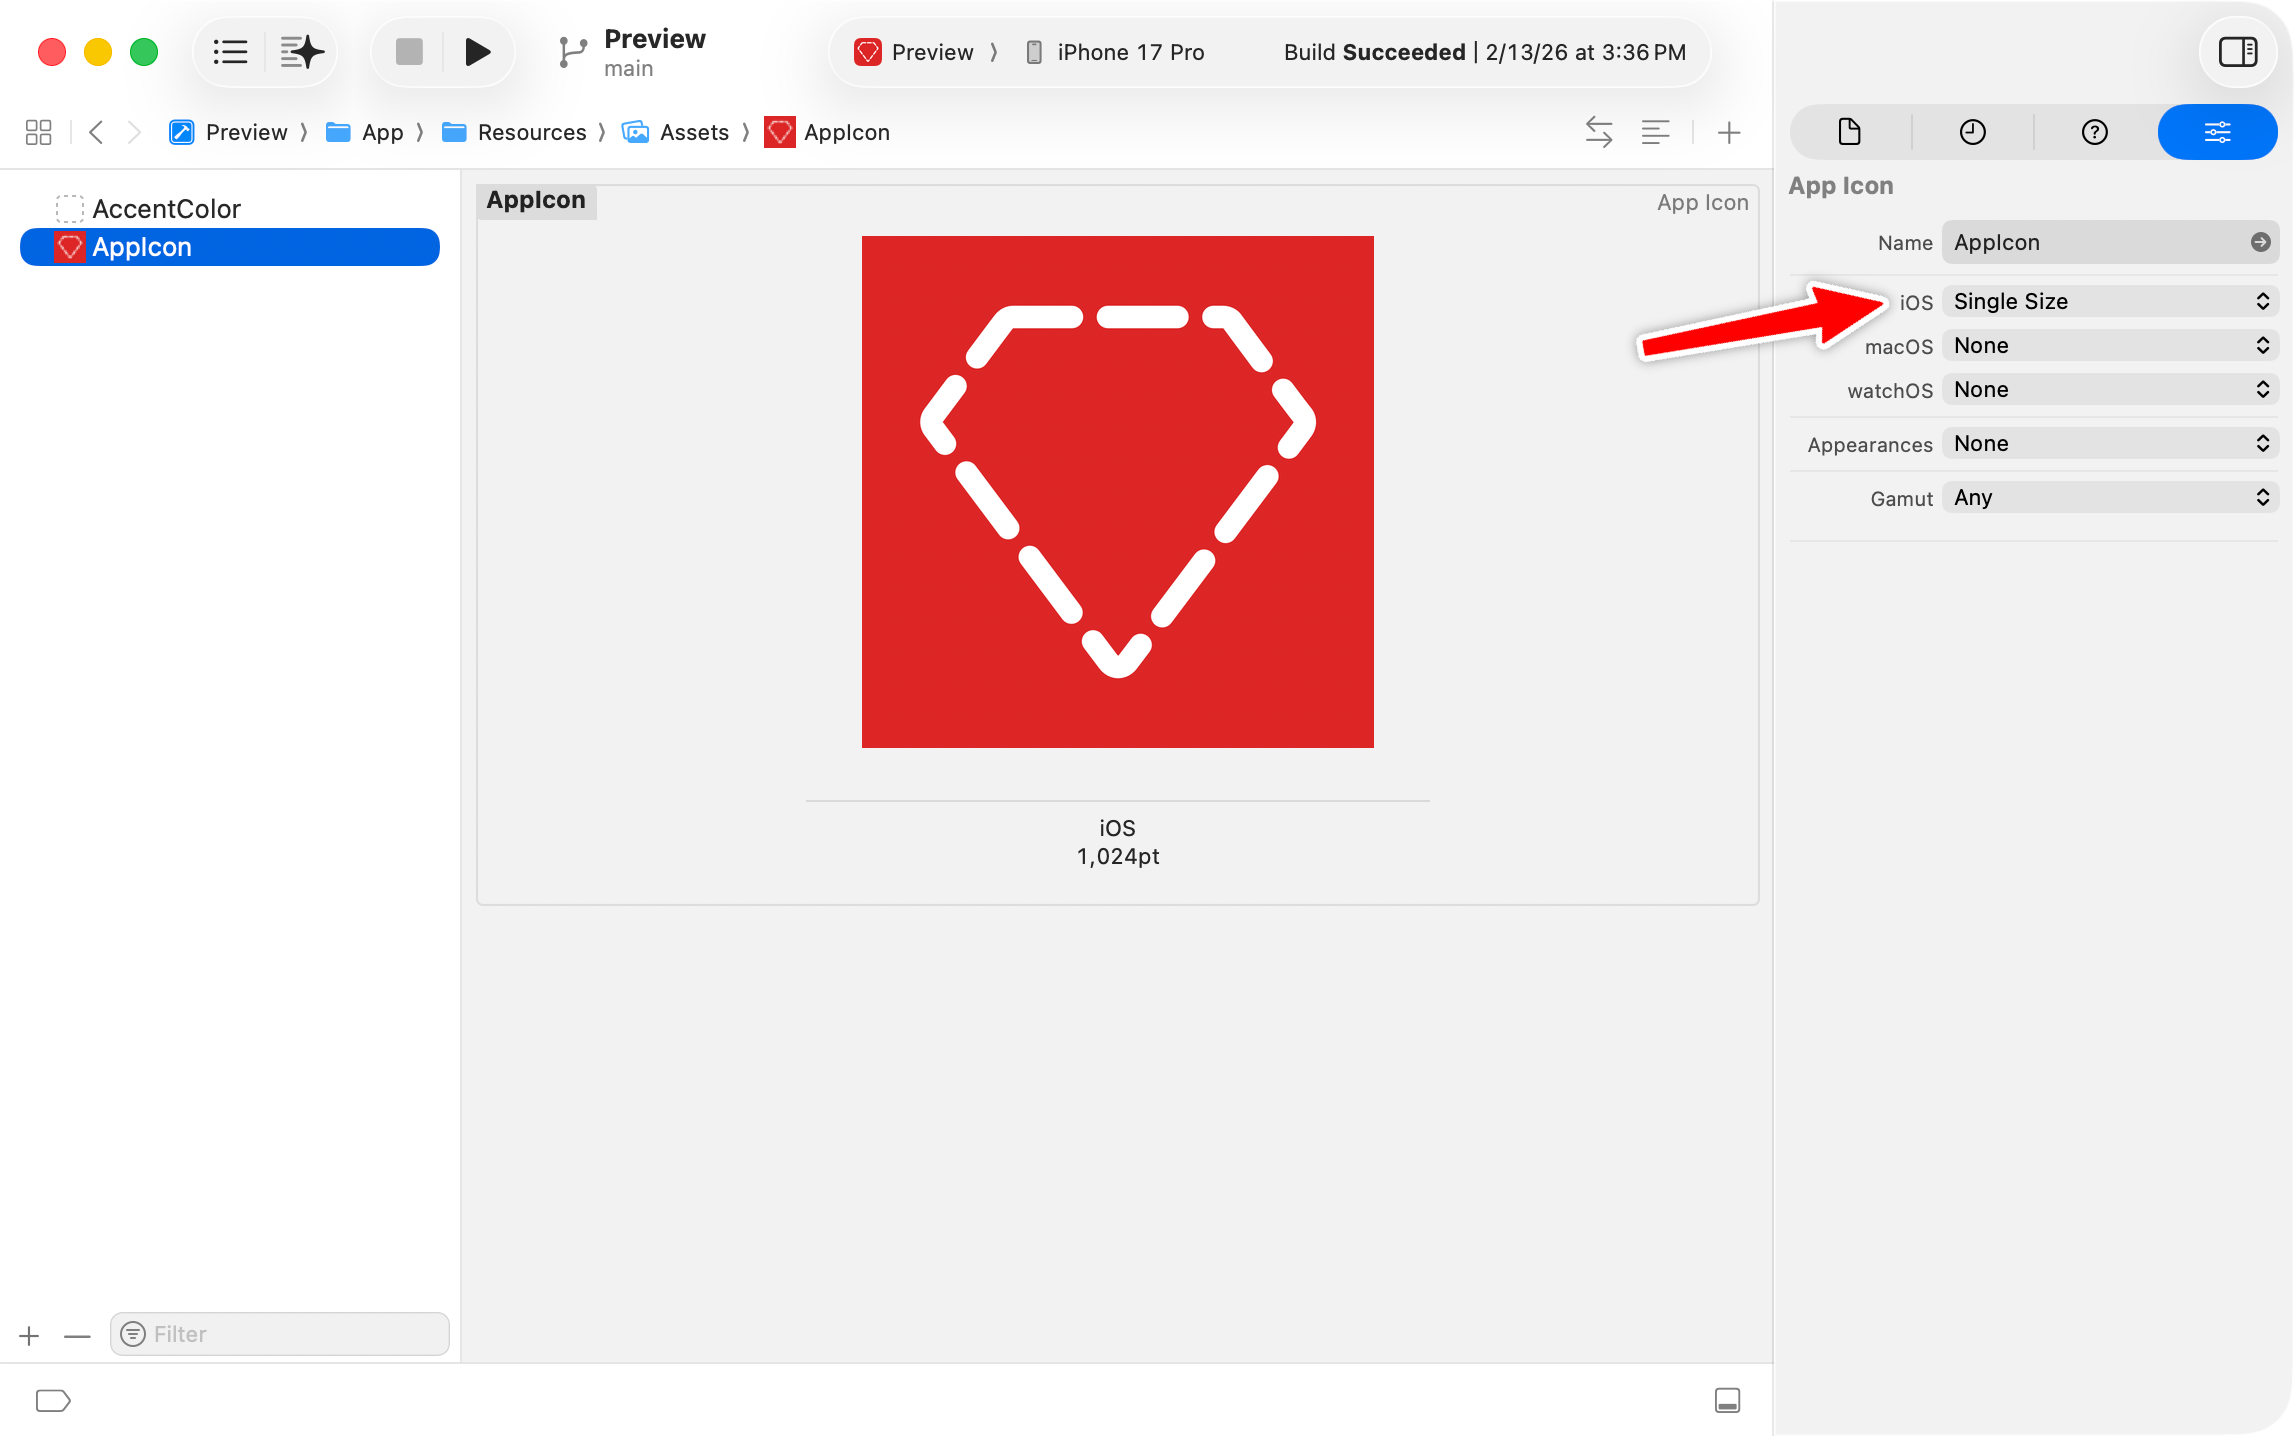
No need to design each version at each size. If you have a clean logo at that resolution, you’re set.
Test with TestFlight before submitting
TestFlight is Apple’s beta testing platform, built right into App Store Connect. Use it.
Internal testing lets up to 100 members of your team install builds immediately after processing. No review needed. This is your first line of defense for catching obvious issues on real devices.
External testing opens it up to 10,000 testers, but requires a quick beta review from Apple before the build is available.
Start with internal testing. Share the TestFlight link with your team, get real feedback on real devices. The Simulator is great for development, but there’s no substitute for tapping through your app on an actual phone.
I can’t tell you how many times I’ve caught a native- or bridge-component-integration bug when running the app on my physical iPhone for the first time.
Skip the encryption compliance wait
Speaking of TestFlight, make sure to add ITSAppUsesNonExemptEncryption = NO to your Info.plist.
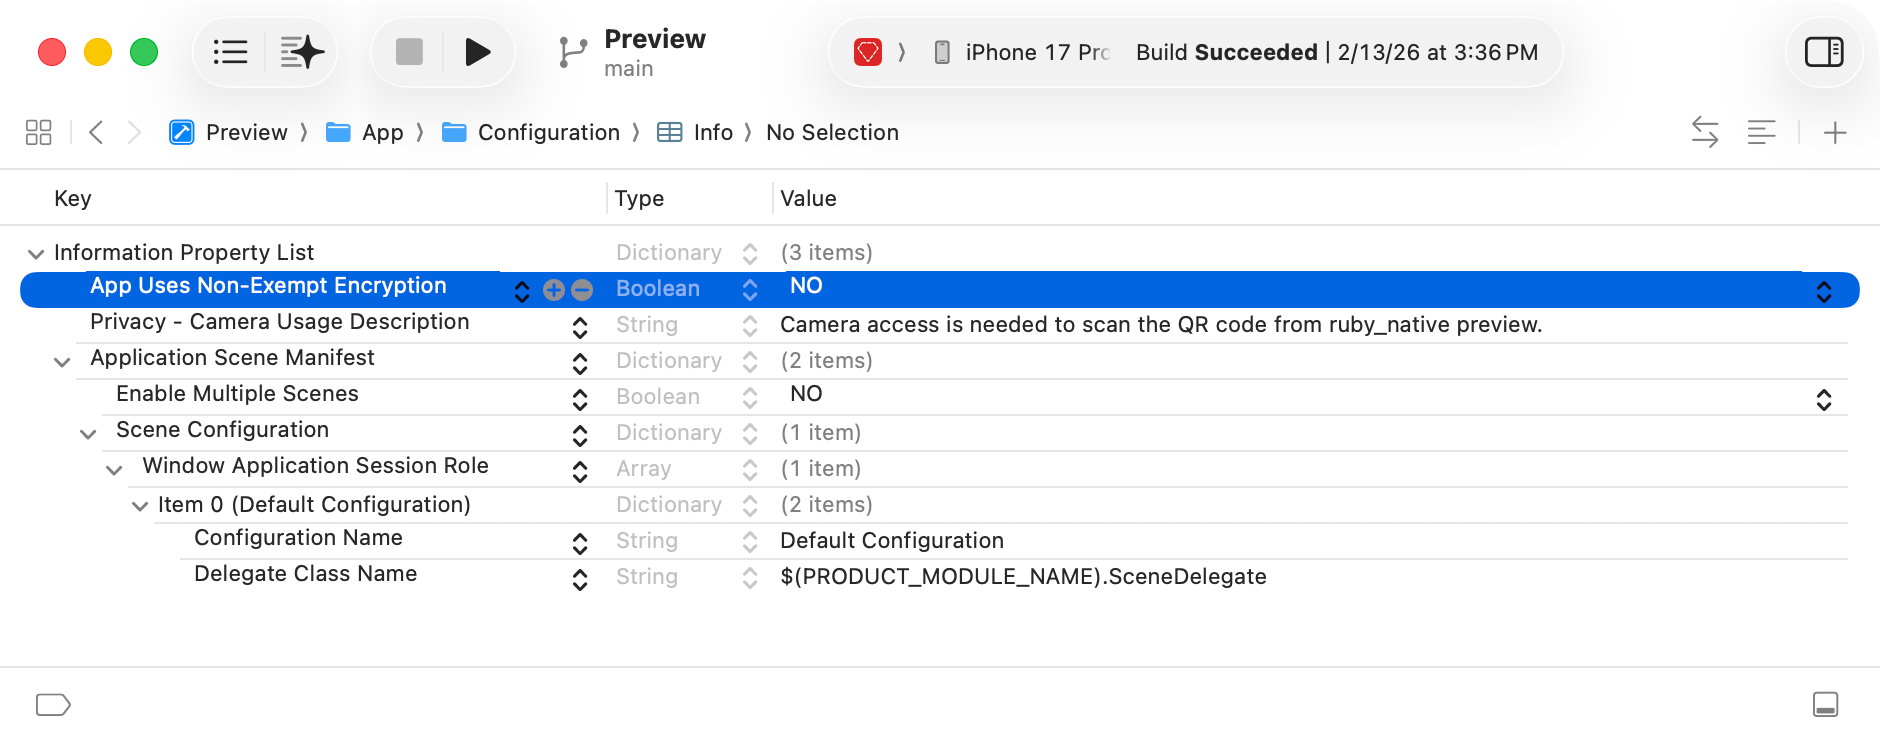
Without this, every build you upload to TestFlight sits in “Processing” waiting for you to manually answer export compliance questions in App Store Connect. It’s a silent blocker. Your build will look like it’s still processing and you’ll be wondering what went wrong.
Unless you’re doing something custom with encryption beyond standard HTTPS, set this to NO.
The rest of this post covers: creating App Store screenshots (with and without a designer), keyword optimization tricks, privacy and review questionnaire gotchas, how to avoid Apple’s “minimum functionality” rejection, and a post-launch tip that saves you 15% on every in-app purchase.
